
wpc wall cladding installation guide
wpc wall cladding installation guide: detailed steps and precautions
Introduction: As the concept of environmental protection is deeply rooted in people’s hearts, wpc wall cladding, as a green and environmentally friendly decorative material, is increasingly loved by consumers. This article will give you a detailed introduction to the installation steps of wpc wall cladding, helping you to easily create a beautiful and practical interior space.
1. Introduction to wpc wall cladding
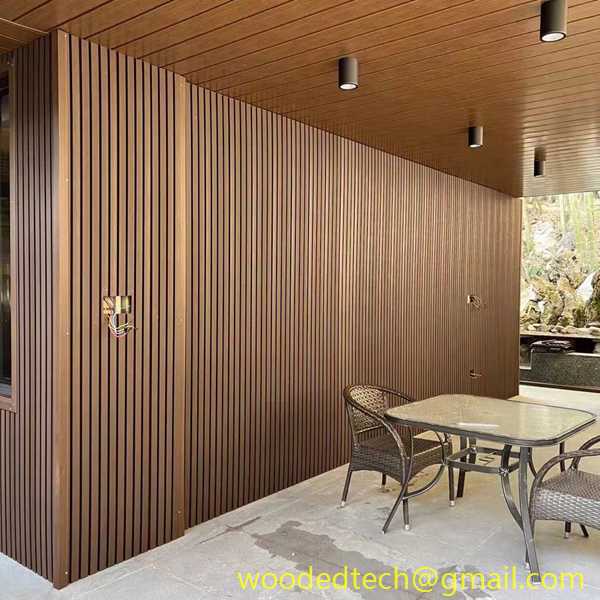
wpc wall cladding is a composite material made of wood powder, plastic, etc. as the main raw materials, through high temperature, high pressure, extrusion and other processes. It has the texture and beauty of wood, and at the same time has the waterproof and anti-corrosion properties of plastic. It is an ideal interior decoration material.
2. Preparation before wpc wall cladding installation
1. Material preparation: Purchase wpc wall cladding that meets national standards to ensure reliable quality.

2. Tool preparation: electric drill, screwdriver, hammer, saw, ruler, pencil, etc.
3. Auxiliary material preparation: sealant, expansion screws, angle code, pendant, etc.
4. Environmental preparation: Ensure that the installation site is clean, tidy and free of debris.
III. Wpc wall cladding installation steps
1. Base treatment: Polish and clean the wall to ensure that the wall is flat and clean.
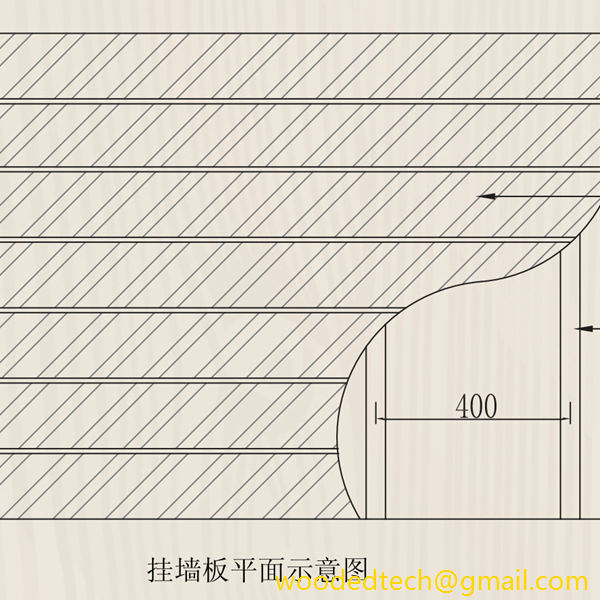
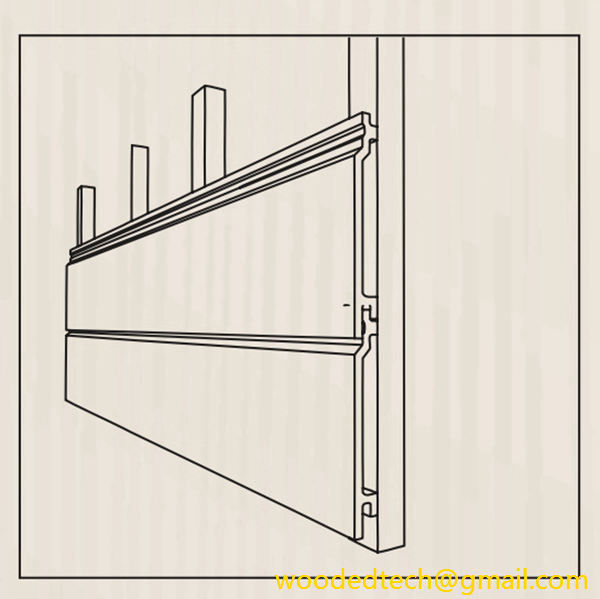
2. Lay the keel: Lay the keel evenly on the wall according to the size of the wall panel. The keel spacing is generally 30-40 cm.
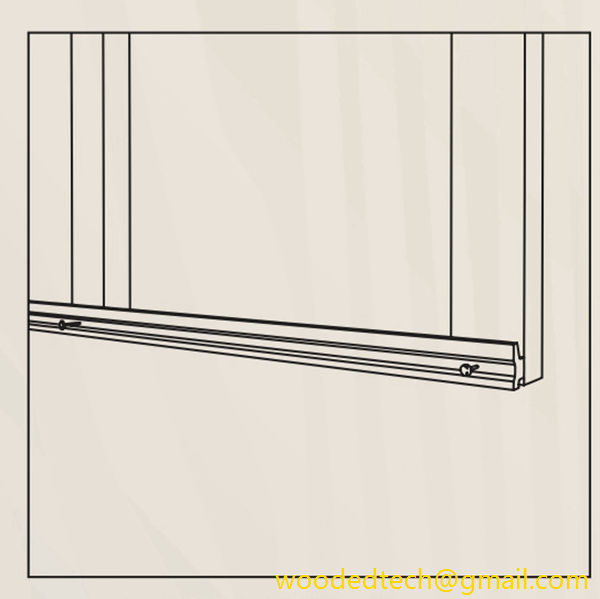
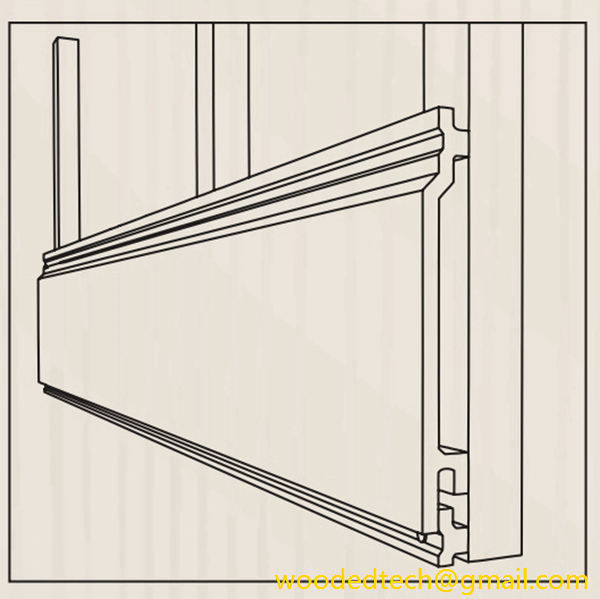
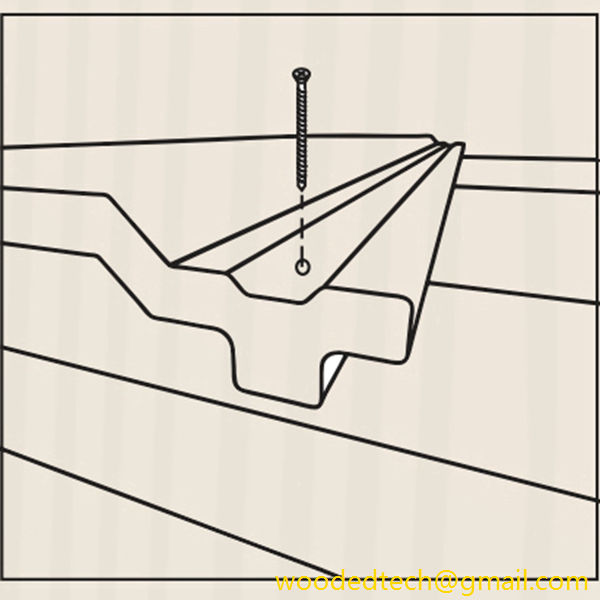
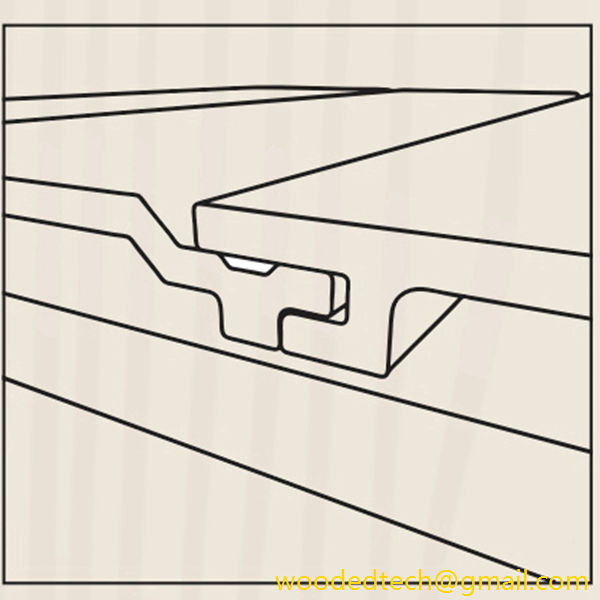
3. Install the wall panel: Starting from the corner of the wall, insert the wall panel into the keel groove and fix it with screws. Note that there is a certain gap between the wall panels to facilitate thermal expansion and contraction.
4. Edge treatment: Use angle code to trim the edges at the joints of the wall panels to make the interface more tight.
5. Polishing: After installation, polish the surface of the wall panel to make it smoother and more beautiful.
6. Coloring: Choose the appropriate color to color the wall panel according to personal preference.
7. Cleaning: After installation, clean the wall to ensure that the wall is clean.
4. Precautions for wpc wall cladding installation
1. During the installation process, pay attention to safety and avoid scratches and bumps.
2. When installing the wall panels, ensure that the spacing between the keels is uniform to avoid deformation of the wall panels.
3. At the joints of the wall panels, use corners to trim the edges to prevent cracks at the interfaces.
4. During the installation process, check the quality of the wall panels at any time and solve problems in time.
5. After the wall panels are installed, check them regularly and repair problems in time.
5. Summary
wpc wall cladding installation is simple, beautiful, and environmentally friendly, and is increasingly favored by consumers. Through the above detailed installation steps and precautions, I believe you have mastered the installation skills of wpc wall cladding. In the actual operation process, as long as you are serious and meticulous, you will be able to easily create a beautiful and practical indoor space.