 Italiano
  English
  Español
  Français
  Português
  Deutsch
  Русский
  العربية
  简体中文
简体中文  香港中文
香港中文  한국어
한국어  日本語
日本語  Türkçe
  Nederlands
  Bahasa Indonesia
 Preparazione del sottotelaio
La base di qualsiasi design di successo del pannello a parete per esterni WPC risiede nella preparazione del sottotelaio.Inizia selezionando un'area di livello in cui verranno installati i pannelli.Utilizzare legno trattato o alluminio per costruire un quadro robusto in grado di supportare il peso dei pannelli WPC.Assicurarsi che il telaio sia quadrato e livello; questo impedirà la deformazione e garantire una finitura pulita.La distanza tra i supporti del sottotelaio non deve superare i 60 cm per mantenere la stabilità.È consigliabile utilizzare un livello di spirito durante questo processo per confermare che ogni elemento del telaio è posizionato con precisione.
Una volta che il sottotelaio è in posizione, è essenziale considerare il drenaggio e la ventilazione.Installare il sottotelaio in un modo che consenta il deflusso dell'acqua e il flusso d'aria, poiché l'umidità stagnante potrebbe portare a problemi lungo la linea.Incorporare una leggera pendenza nel telaio può aiutare a dirigere l'acqua lontano dai pannelli, riducendo al minimo il rischio di marciume e muffa.
Metodi di fissaggio per i pannelli WPC
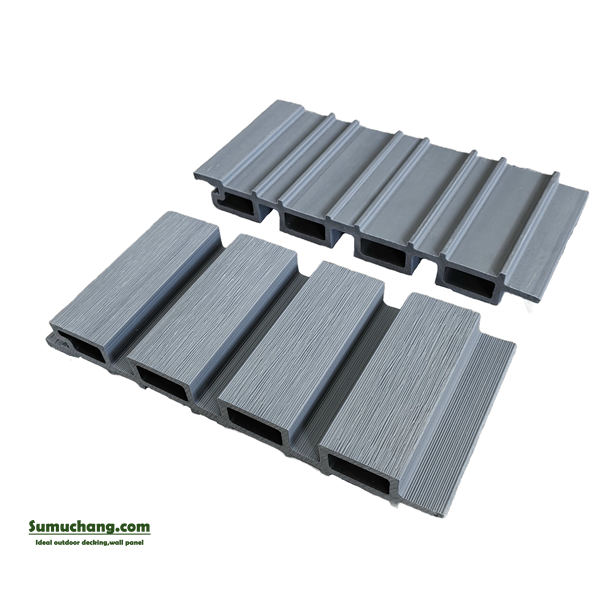
Quando si tratta di collegare i pannelli a parete esterni WPC al sottotelaio, ci sono diversi metodi da considerare.L'approccio più comune è quello di utilizzare viti in acciaio inossidabile specificamente progettate per i materiali WPC.Queste viti aiutano a prevenire la corrosione e garantiscono una vestibilità sicura.Si consiglia di preforare i fori per evitare di dividere i pannelli durante l'installazione.
Un altro metodo prevede l'utilizzo di elementi di fissaggio nascosti che si agganciano alle scanalature dei pannelli WPC.Questo non solo fornisce una finitura pulita, ma consente anche un certo movimento nei pannelli, accomodando l'espansione naturale e la contrazione.Indipendentemente dal metodo scelto, assicurarsi che i pannelli siano fissati strettamente contro il sottotelaio per evitare che qualsiasi sferragliamento o allentamento nel tempo.
Gestione delle lacune di espansione
La corretta gestione delle lacune di espansione è fondamentale nell'installazione di pannelli a parete per esterni WPC.A causa delle fluttuazioni di temperatura, i materiali WPC possono espandersi e contrarsi, motivo per cui mantenere una spaziatura adeguata è fondamentale.In genere, un divario di 5-10 mm dovrebbe essere lasciato intorno ai bordi dei pannelli e tra i pannelli adiacenti.Queste lacune consentono il movimento senza causare danni o deformazioni al design del pannello a parete.
È fondamentale considerare anche il clima specifico dell'area di installazione.Nelle regioni con variazioni di temperatura estreme, possono essere necessari maggiori spazi per adattarsi a maggiori spostamenti di dimensioni.Si rimanda sempre alle linee guida del produttore per raccomandazioni specifiche sulle lacune di espansione per garantire un'installazione di successo.
Tagliare e aderere ai pannelli
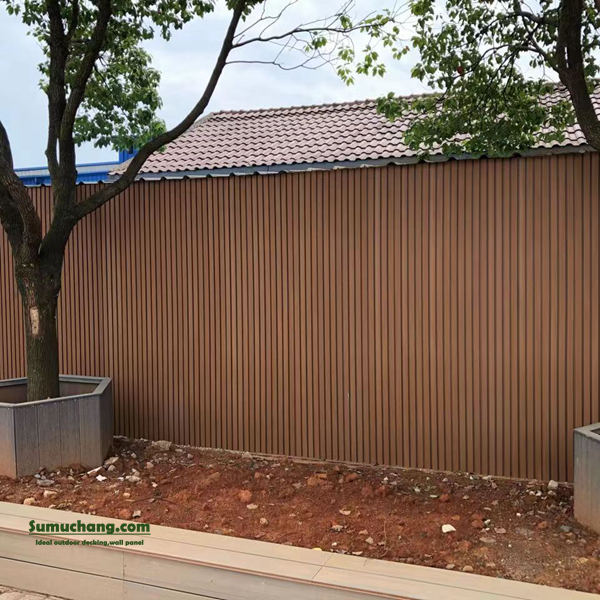
Il taglio dei pannelli WPC richiede precisione e gli strumenti giusti per ottenere una finitura professionale.Utilizzare una sega a denti fini o una sega elettrica dotata di una lama di qualità progettata per i materiali compositi.Quando si misura e si taglia, è consigliabile tenere conto delle lacune di espansione, assicurando che ogni pezzo si adatti perfettamente in posizione senza forzare il materiale.
L'installazione dei pannelli comporta l'allineamento dei bordi tagliati con il sottotelaio e il fissaggio sicuro in posizione.Per angoli o giuni, considera l'utilizzo di finiture o lampeggianti per creare un aspetto lucido, proteggendo anche le cuciture dall'umidità.Prenditi il tuo tempo durante questo passaggio, poiché la precisione dei tuoi tagli avrà un impatto significativo sull'estetica generale dell'installazione.
Suggerimenti per la manutenzione per la longevità
<pPer garantire che i pannelli a parete esterna WPC mantengano il loro aspetto e la funzionalità nel tempo, è necessaria una manutenzione regolare.Pulire i pannelli con acqua e sapone delicato aiuterà a rimuovere sporco e sporco che possono accumularsi.Evitare sostanze chimiche aggressive che possono danneggiare la finitura superficiale.È importante ispezionare periodicamente i pannelli per eventuali segni di usura, come crepe o dissolvenza.Se vengono rilevati problemi, affrontarli tempestivamente può prevenire problemi più significativi in futuro.Mantenere i pannelli liberi da detriti e garantire un corretto drenaggio aiuterà anche a mantenere la loro integrità, consentendo al design del pannello a parete per esterni WPC di resistere alla prova del tempo.