As people pay more attention to environmental protection and low-carbon life, outdoor wpc deck has gradually become a new favorite for home decoration. wpc deck is a new composite material with the advantages of environmental protection, waterproof, anti-slip, anti-aging, easy installation and long service life. So, how to install outdoor wpc deck? This article will introduce you to the installation steps and practical tips of outdoor wpc deck in detail.
1. Preparation before installation
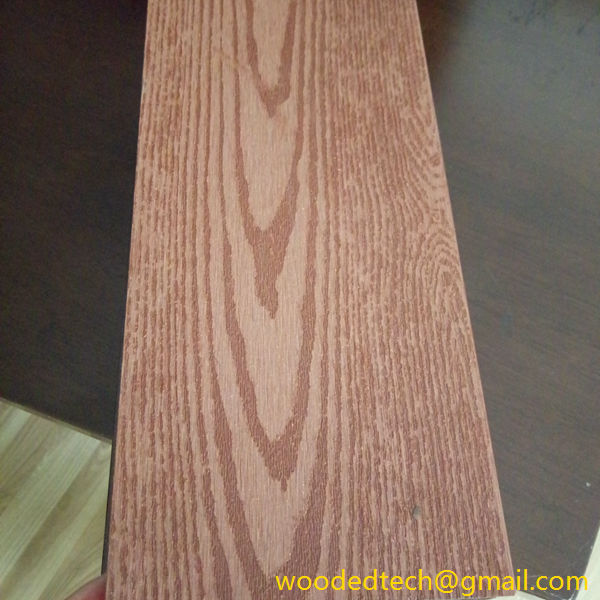
Material preparation: Buy a suitable outdoor wpc deck and choose the color, specifications, etc. according to actual needs.
Tool preparation: Prepare common tools such as woodworking saws, hammers, levels, ink lines, drills, screwdrivers, etc.
Foundation treatment: Make sure the ground is flat, clean, and free of debris. If there are bumps, leveling treatment is required.
Laying the base layer: Lay a layer of waterproof and moisture-proof film on the ground to prevent moisture penetration.
2. Installation steps
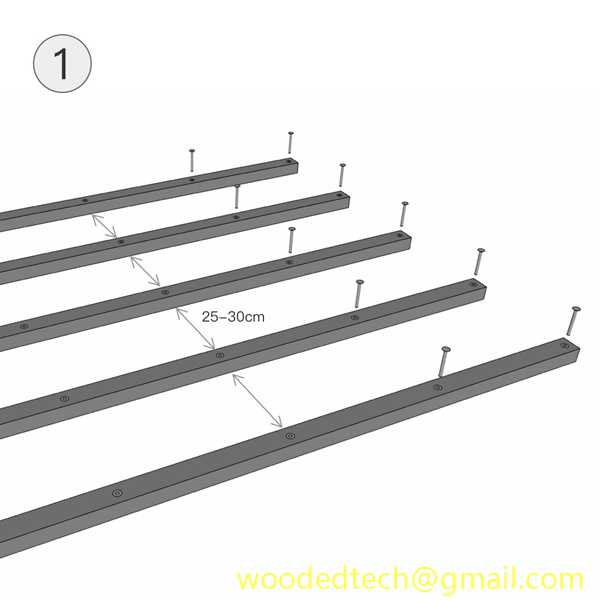
Laying the positioning board: According to the design requirements, determine the laying direction of the floor, lay the positioning board, and the spacing between the positioning boards is 10cm.

Laying the first row of floorboards: Lay the first row of floorboards flat on the ground, and use a carpenter’s saw to cut the two ends of the floorboards at a 45-degree angle to ensure that the floorboards fit tightly with the ground.
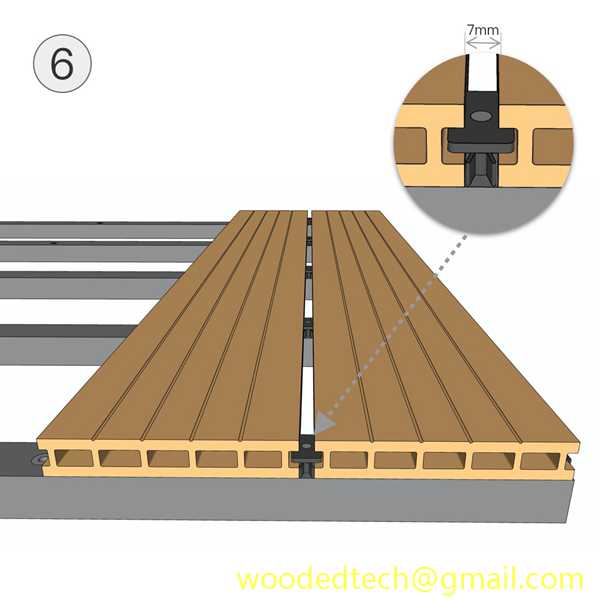
Laying the second row of floorboards: Stagger the second row of floorboards with the first row of floorboards, and use a hammer to hit the mortise and tenon joints of the floorboards to make them fit tightly.
Repeat laying: Follow the above steps to lay the third and fourth rows of floorboards in sequence until the entire area is laid.

Edge treatment: Use special edge strips to close the edges of the floor to ensure beauty.
Fix the floor: Drive screws between the floorboards and the base layer to fix the floorboards on the base layer to prevent the floorboards from loosening.
Inspection and acceptance: Check whether the floor surface is flat and there are no obvious gaps. If there are any problems, make adjustments in time.
III. Practical skills
During the installation process, ensure that the floorboards are kept at a certain distance from the ground, reserve expansion space, and prevent the floorboards from deforming due to thermal expansion and contraction.

When laying the floorboards, pay attention to the color and texture of the floorboards to make the overall effect more harmonious and beautiful.
When cutting the floor, use professional tools to ensure beautiful cutting effects.
During the installation process, try to avoid using adhesives such as glue to avoid affecting the service life of the floor.
After the installation is completed, clean up the construction site in time to ensure a clean environment.
In short, outdoor wpc deck installation requires carefulness, patience, and certain skills. Following the installation steps and practical tips provided in this article, I believe you will be able to easily complete the installation of outdoor wpc deck. While enjoying a beautiful and comfortable living space, it also contributes to the cause of environmental protection.

8. Safety precautions
Construction safety: During the installation of plastic wood flooring, construction workers should wear necessary personal protective equipment, such as safety helmets, non-slip shoes, gloves, etc. to ensure construction safety.
Electrical safety: When using power tools, ensure the safety of the power supply, avoid exposed wires and short circuits, and use power sockets with leakage protection.
Environmental protection: During the construction process, local environmental protection laws and regulations should be observed, and waste materials should be properly handled to avoid pollution to the environment.
9. Post-installation inspection
Stability check: After the installation is completed, the stability of the floor should be checked to ensure that all panels are firmly connected and there is no looseness.
Flatness check: Check whether the floor surface is flat and there are no obvious bulges or depressions.

Drainage check: Make sure the floor drainage system is normal and there is no water accumulation, especially in outdoor environments, good drainage is the key to preventing floor damage.
Edge treatment: Check whether the floor edge is properly treated to avoid affecting the use due to edge warping or damage.
10. Usage suggestions

Avoid heavy pressure: Do not place heavy objects on the plastic wood floor to avoid deformation or damage to the floor.
Avoid chemicals: Avoid using detergents containing corrosive chemicals to avoid damaging the floor surface.
Regular inspection: Check the use of the floor regularly and deal with possible damage or wear in time.
Shading measures: For outdoor plastic wood floor, it is recommended to install shading facilities to reduce direct sunlight and extend the service life of the floor.
11. Conclusion

When installing outdoor plastic wood floor, following the correct installation process and precautions is the key to ensuring the quality and service life of the floor. Correct installation and maintenance can not only ensure the beauty and practicality of the floor, but also extend the service life of the floor. If you encounter any problems during the installation process, it is recommended to consult a professional installation team or manufacturer for professional guidance and help. With proper installation and maintenance, outdoor plastic wood flooring will add lasting beauty and comfort to your outdoor space.