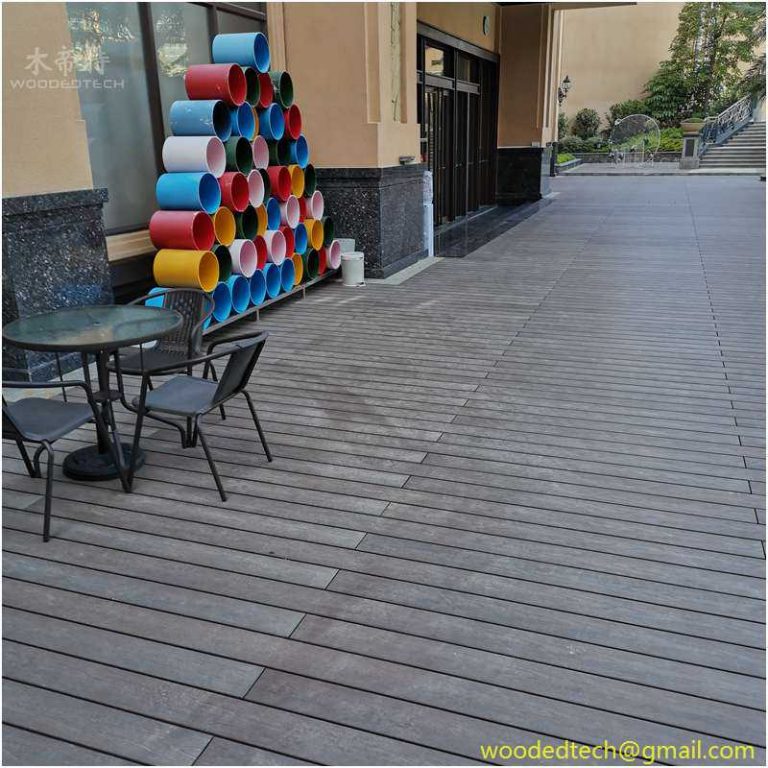
Pelajari Cara Memasang Dek Komposit untuk Pemasangan yang Mudah
Saat mempertimbangkan pemasangan penghiasan komposit, sangat penting untuk memahami proses dan bahan yang terlibat untuk mencapai hasil terbaik. Decking komposit telah mendapatkan popularitas karena daya tarik estetika, daya tahan, dan persyaratan perawatan yang rendah. Jenis decking ini terbuat dari campuran serat kayu dan plastik daur ulang, menawarkan tampilan kayu tradisional sekaligus menghilangkan beberapa masalah umum yang terkait dengannya, seperti pembusukan dan serpihan. Untuk membantu Anda menavigasi proses pemasangan dengan mudah, berikut ini adalah panduan komprehensif tentang cara memasang decking komposit.
Sebelum memulai pemasangan, Anda harus mengumpulkan semua alat dan bahan yang diperlukan untuk proyek tersebut. Anda akan membutuhkan papan dek komposit, gergaji bundar atau gergaji mitra untuk memotong papan, bor untuk sekrup, pita pengukur, waterpas, dan garis kapur. Selain itu, pastikan Anda memiliki pengencang yang sesuai yang dirancang khusus untuk dek komposit, karena ini akan memberikan kinerja terbaik dan umur panjang untuk dek Anda.

Setelah Anda mengumpulkan peralatan Anda, langkah pertama adalah merencanakan tata letak dek Anda. Tentukan ukuran dan bentuk area di mana dek akan dipasang. Disarankan untuk membuat sketsa desain Anda di atas kertas, termasuk lokasi balok penyangga dan balok. Perencanaan yang tepat akan membantu Anda memvisualisasikan produk jadi dan memastikan Anda membeli bahan dalam jumlah yang tepat.
Setelah merencanakan tata letak Anda, siapkan area di mana penghiasan komposit akan dipasang. Ini mungkin melibatkan pembersihan vegetasi yang ada, meratakan tanah, dan memastikan drainase yang baik. Jika dek Anda dibangun di atas permukaan yang sudah ada, seperti beton, pastikan permukaannya bersih dan bebas dari puing-puing. Persiapan lokasi yang tepat sangat penting untuk memastikan bahwa dek Anda tetap rata dan stabil dari waktu ke waktu.
Selanjutnya, Anda perlu memasang struktur penyangga, yang biasanya terdiri dari balok dan balok. Jarak antar balok akan tergantung pada produk spesifik yang Anda gunakan, jadi sangat penting untuk merujuk pada panduan produsen. Biasanya, balok harus diberi jarak tidak lebih dari enam belas inci untuk memberikan dukungan yang memadai untuk papan decking. Saat memasang balok, gunakan waterpas untuk memastikannya rata dan lurus.
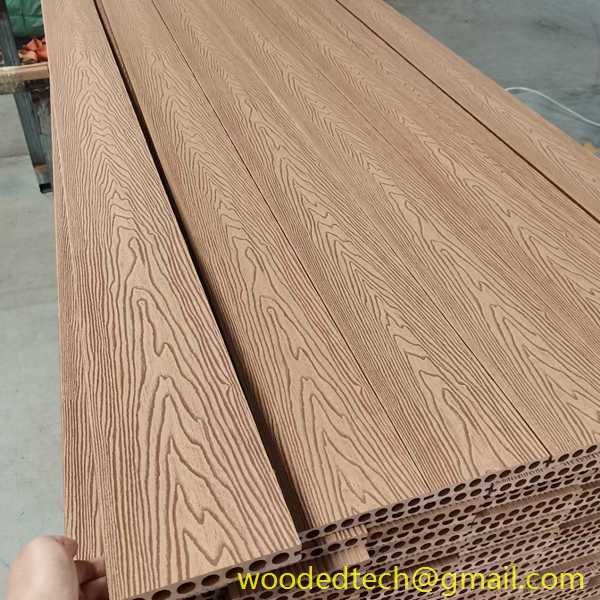
Setelah struktur penyangga terpasang, sekarang saatnya untuk memotong papan dek komposit sesuai ukuran. Ukur panjang area di mana papan akan dipasang, dan gunakan gergaji bundar atau gergaji mitra untuk memotong papan yang sesuai. Disarankan untuk memotong papan sedikit lebih panjang dari yang dibutuhkan dan kemudian memangkasnya seperlunya agar pas. Selalu kenakan kacamata pengaman saat memotong bahan untuk melindungi mata Anda dari serpihan.
Dengan papan decking yang sudah dipotong sesuai ukuran, langkah selanjutnya adalah memulai proses pemasangan. Mulailah dari salah satu ujung dek dan letakkan papan pertama pada posisinya, pastikan papan tersebut sejajar dengan tepi struktur penyangga. Saat memasang papan, sangat penting untuk menyisakan celah kecil di antara setiap papan untuk memungkinkan terjadinya pemuaian dan penyusutan akibat perubahan suhu. Celah ini, biasanya sekitar seperdelapan inci, akan memastikan bahwa penghiasan Anda tetap utuh dari waktu ke waktu tanpa melengkung atau tertekuk.
Saat mengencangkan papan ke balok, penting untuk menggunakan pengencang yang sesuai. Banyak produk penghiasan komposit dilengkapi dengan sistem pengikat tersembunyi yang memungkinkan tampilan yang bersih dan mulus. Jika Anda menggunakan sekrup tradisional, pastikan untuk mengebor lubang pilot untuk mencegah papan terbelah. Kencangkan setiap papan dengan kuat, tapi jangan kencangkan sekrup secara berlebihan, karena hal ini dapat menyebabkan kerusakan pada material komposit.

Saat Anda terus memasang papan decking, periksa secara berkala apakah papan tersebut rata dan berjarak dengan benar. Gunakan waterpas untuk memastikan bahwa setiap papan sejajar dengan papan di sebelahnya, dan lakukan penyesuaian sesuai kebutuhan. Perhatian terhadap detail ini akan berkontribusi pada keseluruhan tampilan dan fungsionalitas dek Anda.
Setelah Anda memasang semua papan dek, sekarang saatnya untuk menyelesaikan bagian tepinya. Ini mungkin melibatkan pemotongan beberapa papan terakhir agar pas dengan tepi dek. Anda mungkin juga ingin menggunakan papan fasia untuk menutupi bagian tepi dan memberikan tampilan yang halus. Papan fasia harus dipasang dengan aman menggunakan sekrup atau perekat, tergantung pada preferensi Anda.
Setelah menyelesaikan pemasangan, luangkan waktu sejenak untuk memeriksa pekerjaan Anda. Pastikan semua papan terpasang dengan baik, dan periksa apakah ada celah atau area yang tidak rata yang mungkin perlu diperhatikan. Sebaiknya bersihkan permukaan dek untuk menghilangkan puing-puing dari proses pemasangan.
Terakhir, setelah penghiasan komposit Anda selesai dipasang dan diperiksa, Anda dapat menikmati ruang luar yang baru. Dek komposit membutuhkan perawatan minimal dibandingkan dengan kayu tradisional, tetapi tetap penting untuk menjaganya tetap bersih dengan menyapu puing-puing dan mencucinya sesekali dengan sabun dan air.
Dengan persiapan yang tepat dan perhatian terhadap detail, memasang penghiasan komposit dapat menjadi proyek yang mudah yang dapat mempercantik ruang luar Anda. Tidak hanya menyediakan area yang indah untuk menghibur dan bersantai, tetapi juga menawarkan solusi jangka panjang yang dapat bertahan dari berbagai elemen. Dengan mengikuti langkah-langkah ini, Anda dapat memperoleh dek yang terlihat profesional yang akan melayani Anda dengan baik selama bertahun-tahun yang akan datang.