 English
 Español
 Français
 Português
 Deutsch
 Italiano
 Русский
 العربية
 简体中文
 香港中文
 한국어
 日本語
 Türkçe
 Nederlands
 Bahasa Indonesia
Choose a Supplier Before Planning the Installation
For a mobile home, a dependable installation starts with a supplier who can provide more than attractive boards. Ask for product specifications covering board dimensions, weight, permitted joist spacing, fixing type, drainage requirements and temperature movement. Request installation instructions for the exact decking or cladding profile, not a generic composite guide. A supplier should also confirm whether the boards are capped or uncapped, intended for horizontal or vertical use, and suitable for the exposure and traffic expected at your site.
Check that sample boards, colour options and replacement components match the order, and confirm lead times for clips, starter trims and finishing pieces. Mobile homes may use lightweight chassis and existing platforms that cannot accept arbitrary extra loads. Compare the proposed decking weight with the platform’s capacity and obtain advice from a competent building professional where the structure or load limit is uncertain. Selecting composite decking for mobile homes is therefore a coordinated decision about product, subframe and support, rather than a colour choice alone.
Prepare a Sound, Drained Subframe
Inspect the existing base before laying boards. It must be stable, level enough for the specified system, and capable of carrying the decking and normal use without movement. Remove loose material and check for rot, corrosion, standing water or damaged supports. Do not fix a new surface over a weak deck to conceal defects. For a new subframe, use the material and support details approved for the site, with joists aligned consistently and securely anchored to suitable structural members. Avoid fastening into thin cladding or unsupported edges.

Set joist spacing to the manufacturer’s limit, reducing the span where the deck will carry heavier loads or experience concentrated foot traffic. Keep framing clear of soil and arrange drainage so water can escape rather than collect beneath the boards. Provide airflow under the deck and around the perimeter; trapped dampness can shorten the life of adjacent timber and encourage staining. Check the frame with a straightedge and square, then mark joist positions where they remain visible during installation. If the deck joins the mobile home, preserve access to service points and do not obstruct vents, drainage outlets or inspection panels.
Lay Boards with Controlled Gaps
Acclimatise boards as directed on the product sheet, store them flat and keep them supported before fitting. Mark the starting edge and establish a straight reference line, since small errors become conspicuous across a long run. Fit starter clips or the specified edge fixing, then secure each board with the compatible hidden clips or face screws. Use only the fasteners recommended for that profile. Drive screws squarely and to the stated depth; over-tightening can restrict movement or damage the board.
Leave end-to-end, side and perimeter gaps according to the supplier’s temperature guidance and the installation temperature. Composite expands and contracts, and a board fitted tightly between fixed edges can buckle as it warms. Keep board ends supported by a joist, with the required fixing distance from each cut end. Where the layout needs a butt joint, provide separate support for both ends rather than relying on one narrow fixing point. Stagger joints where practical for a tidy appearance, while maintaining the specified drainage and expansion clearances. Never assume a gap used for timber is correct for a WPC product.

Cut Cleanly and Fit Wall Cladding Correctly
Measure each cut twice and use a sharp, fine-toothed blade suited to composite material. Support the board fully to limit vibration and chipping, and wear eye protection and a suitable dust mask. Remove burrs with a light sanding only if the manufacturer permits it. Leave cut ends clean and avoid sealing them unless the system specifically calls for an end treatment. For notches around posts or fittings, keep the remaining section within the product’s permitted limits and add support where necessary.
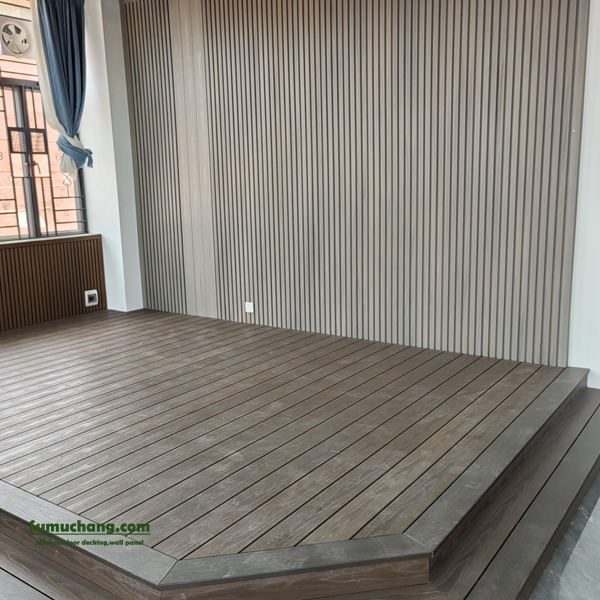
For WPC wall cladding, first fix battens to a sound backing at the spacing stated for the chosen profile. Confirm that the wall can carry the system, and provide a ventilated cavity, drainage path and suitable flashings around openings. Start from a level line, use the designated starter and joining components, and follow the supplier’s fixing sequence so concealed clips engage fully. Maintain clearances at corners, windows, doors and the top and bottom of the cladding. Do not bridge damp-proof details or block vents. Decking boards and wall panels can look similar but may have different structural ratings and fixing systems, so use each only for its intended application.
Inspect and Maintain the Finished Surface
After installation, check that clips are engaged, screws are secure, board ends are supported and all drainage routes remain open. Walk the deck to identify movement, raised edges or noise, and correct defects before the area enters regular use. Keep the supplier’s product records and installation details; they help with warranty queries and future repairs. A trusted supplier should make replacement boards and compatible fittings identifiable, rather than leaving the installer to guess at profile or batch differences.
Routine care is straightforward: sweep away leaves and grit, wash with water and a mild cleaner, and clear debris from gaps so rain can drain freely. Clean spills promptly and use a soft brush for dirt lodged in the surface texture. Avoid metal shovels, aggressive solvents and pressure-washer settings that could mark the finish; follow the product guidance for snow, grease and stains. Inspect fixings, edges, cladding flashings and the subframe periodically, particularly after severe weather. Prompt attention to a loose clip or blocked outlet is simpler than replacing boards after movement or water damage has spread.